Assembling torsion balances – models DWM2 and DWM2-1
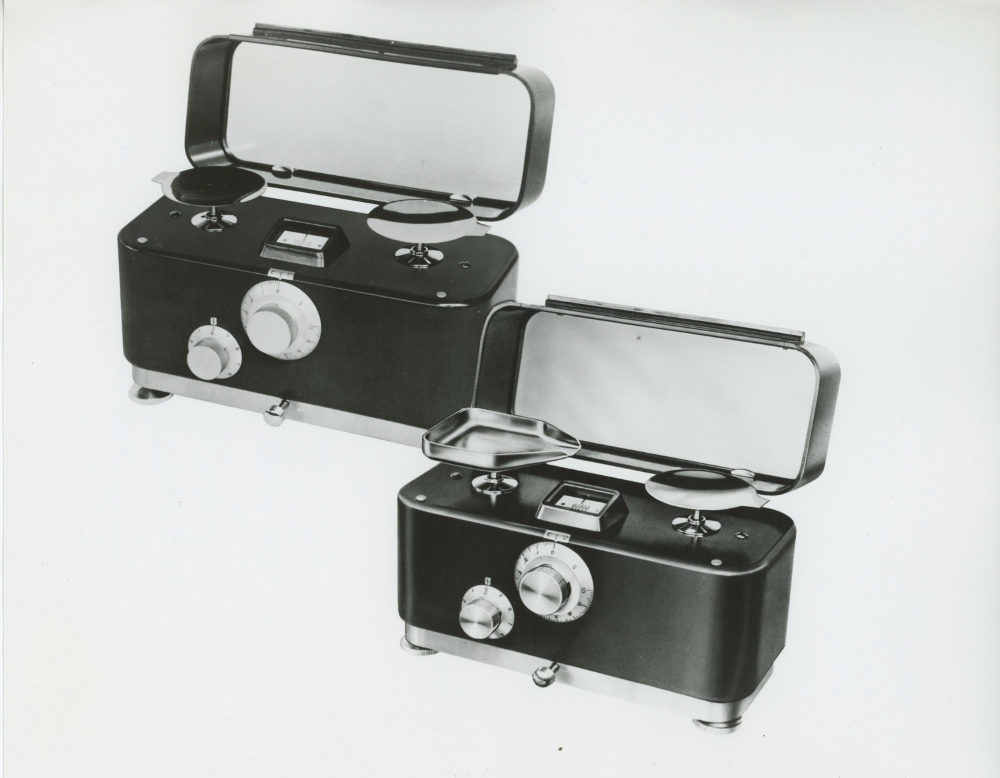
This is a precision instrument which has been carefully adjusted for a maximum degree of sensitivity. Please handle all parts gently in unpacking. The pans and pan supports are packed in tissue under the lid of the balance. Remove these loose parts and set aside. Do not dispose of any packing material until the balance is completely assembled and operating properly. Contact the carrier if there is any evidence of damage in transit.
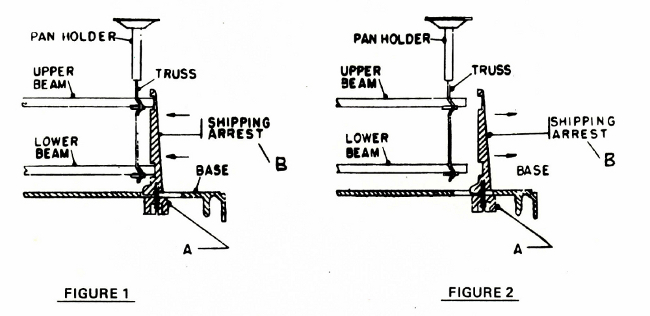
The balance is always locked with internal shipping arrest posts (B) before shipping to avoid breakage. Figure 1 illustrates the locked position, that is, with shipping arrests (B) restraining the movement of the upper and lower balance beams. Figure 2 shows the unlocked position with the shipping arrests (B) moved away from the beams and secured in position for possible future use.
UNLOCKING THE BALANCE
1. Lay the balance on its back and loosen the two knurled shipping arrest knobs (A) under the base (shown in Figure 1). Do not touch the hex head screws in the center of the knobs. Merely loosen the knobs slightly. Push them as far as possible toward the ends of the balance and tighten again as shown in Figure 2.
2. Place the balance on a firm, level, vibration-free table.
3. Set the balance so that you are directly facing the index.
4. Place the pan holders on the top of the trusses visible through the grommet openings in the top of the balance case. Place pans on pan holders. If balance has a scoop, it should be placed on the left-hand pan holder.
5. Turn the small weight loader knob to zero (0).
6. Detach the weight access plate from the left side of the balance case by removing the two slotted screws. The weights and weight applicator are contained in a small box shipped with balance and packed under the lid. The denominations of the weights can readily be determined by comparison with the outline drawings on the card included in weight box. Instructions for aligning the weights on the plastic weight rack are noted on the inside of the weight access plate. The weights are put into position quite simply by placing them on the special weight applicator, inserting them through the opening, then placing them on the plastic rack so that the 1/16 dia. pin rests in the indent provided.
When installing weights, be sure that metal lifter arms are below the plastic weight rack. The weight loader dial should be at “0” position.
After all weights are in place, rotate the weight loader dial to be certain the weights are seated properly on the weight rack. Replace access door.
7. Level balance front to back. This is accomplished by turning both leveling screws in the same direction at the same time and in equal amounts. This will raise or lower the balance as required to bring the bubble in the level on the lower right side or the case to the center of the level vial.
8. RETURN BOTH DIALS TO ZERO (0). Release the balance by turning the small knob in the lower, front center of the base counter-clockwise. Bring balance into equilibrium by means of leveling screws as follows: If indicator moves to the right, rotate the left leveling screw counter clockwise and the right leveling screw clockwise. The leveling screws should be rotated simultaneously and equally.
9. The balance is now ready for use. If the balance does not operate properly, redneck directions to be certain all steps have been performed. Do not attempt any adjustments you may think necessary, other than those indicated in instructions, without first contacting factory. You may void your warranty.
10. When the balance is to be transported BY HAND, the shipping arrests must first be locked. To do this, slightly loosen the three shipping arrest knobs, move them toward the center of the balance, and tighten securely. Turn the weight loader knob to nine (9) or ninety (90) and tape in place.
If the balance is to be shipped BY COMMERCIAL CARRIER, the weights must be removed from weight loader rack and wrapped separately.
IMPORTANT!
Address all inquiries with regard to repairs, replacement parts or shipping instructions directly to our main office and factory in Clifton, N.J. Always refer to the serial number on the name plate located on the back of the balance case. It will expedite handling of your request.