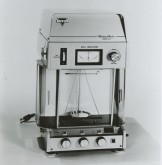
EA-1 Stop Adjustment

As the Models EA-1 and ET-1 are null balances, the beam is always returned to its initial “zero” position. To speed up the weighing operation, the beam travel is limited by four sets of “stops” as shown in Figure 1. The “Stops” are located at the four corners of the weighing element.
If anything is done to the EA-1 or ET-1 balances that might alter the original “zero” position of the beam assembly, it may be necessary to readjust the “stops” so the beam can assume its new “zero” position. The necessity for a “stop” readjustment could be due to changing the original position of the E-Core, by changing the Power Control (PC) Board, minor changes in counterbalance of the weighing element, etc.
Evidence that a “stop” adjustment is necessary could be the “bouncing” of the null indicator needle as it approaches the outer mark on the null meter or the “sticking” of the null indicator needle at either end of the meter. If the “sticking” is on the “increase” side of the meter, when the weight control knobs are at zero, an adjustment of the tare will make the balance operable. If the “sticking” is on the “decrease” side when the weight control knobs are at zero, a readjustment of the “stops” is necessary.
Step 1 Referring to Sketch I, loosen and raise all top “Stops” completely by loosening nut (A) and turning screw (B) counterclockwise. There are four top “stops”.
Step 2 Referring to Sketch I, loosen and lower all bottom stops by loosening Allen set screw (C) and turning screw (D) 1/z — % turn counterclockwise. There are four bottom “stops”.
Turn the balance switch on. Place a light coin (1-2g) on one end of the beam and then on the other end of the beam. If all the stops are fully open, the null indicator needle should swing freely from extreme “increase” mark to extreme “decrease’ mark. If needle does not deflect fully, visually check the “stops” and open more the one (or ones) that are preventing the deflection.
Step 3 Place an object on the pan (approximately 5g) and zero the null indicator (meter) with the weight control knobs. In order to complete the “stop” adjustments the weight placed on the pan should be such that the number appearing in the first window after the decimal place should be between 1 and 8, as per Sketch II.
Step 4 As per Sketch III, turn the 0.1g knob back 1 digit and then turn screw (D) clockwise until the needle just starts to move toward zero, then turn screw (D), counterclockwise 1/8 turn. Tighten the set screw (C).
Check the setting of the “stop” by turning the 0.1gknob ahead 1 digit and then back one digit andseeing if the needle swings freely to its extreme position on the null indicator.
Step 5 As per sketch IV with the 0.1g knob back 1 digit, turn screw (D) clockwise until the needle just starts to move toward zero, then turn screw (D) counterclockwise 1/8 turn. Tighten set screw (C). Check the setting of the “stop” as in Step 4
Step 6 As per Sketch V, with the 0.1g knob ahead one digit, turn screw (D) clockwise until needle just starts to move toward zero, then turn screw (D) counterclockwise 1/8 turn. Tighten set screw (C). Check the setting of the “stop” as in Step 4.
Step 7 As per Sketch VI, with the 0.1g knob ahead one digit, turn screw (D) clockwise until needle just starts to move toward zero, then turn screw counterclockwise 1/8 turn. Tighten set screw (C). Check the setting of the stop by turning the 0.1g knob back 1 digit and then ahead one digit and seeing if the needle swings freely to the extreme position on the null indicator
Step 8 As per Sketch VII with the 0.1g knob ahead 1 digit, turn screw (B) clockwise until the needle just starts to move toward zero then turn screw (B) counterclockwise 1/8 turn. While holding screw (B) in position tighten lock nut (A). Check the “stop” setting by rotating the 0.1g knob back 1 digit then ahead 1 digit and seeing if the needle swings freely to its extreme position on the null indicator.
Step 9 As per Sketch VIII with the 0.1g knob ahead 1 digit, turn screw (B) clockwise until the needle just starts to move toward zero then turn screw (B) counterclockwise 1/8 turn. While holding screw (B) in position tighten lock nut (A). Check “stop” setting as in Step 8.
Step 10 As per Sketch IX, turn the 0.1g knob back 1 digit. Turn screw (B) clockwise until needle just starts to move toward zero, then turn screw (B) counterclockwise 1/8 turn. While holding screw (B) in position tighten lock nut (A). Check “stop” setting by turning the 0.1g knob ahead 1 digit and then back 1 digit and seeing if the needle swings freely to its extreme position on the null indicator.
Step 11 As per Sketch X with the 0.1g knob back 1 digit, turn the screw (B) clockwise until the needle just starts to move toward zero and then turn screw (B) counterclockwise 1/8 turn. Holding screw (B) in position, tighten lock nut (A). Check the “stop” setting as in Step 10.
